Sergio Diaz enthusiastic security engineer
How I Went From Localhost To Production Using The Devops Way Part 2 Of N
Photo by tian kuan on Unsplash
This post covers:
- The continuation of the first post of this series
- How Continuous Delivery integrates with Continuous Integration
- How to deploy the latest version of our application to AWS using Elastic Beanstalk
Continuous Delivery
In the previous post we focused on the setup of the Continuous Integration (CI) part of our implementation. Meaning that now we can add a new feature to our application and push a new version of it to a container repository within minutes. All of this while relying on an automated process (except for the peer review).
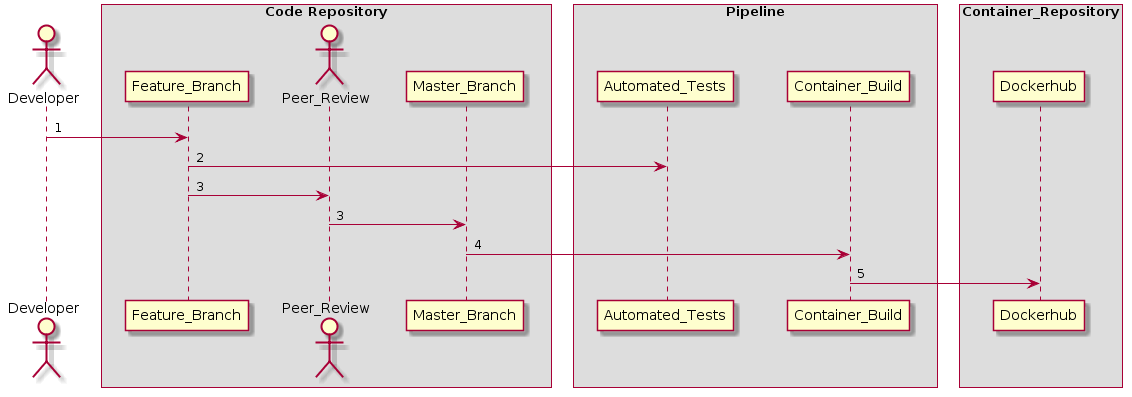
Continuous Integration (Before)
Now we want to be able to send our application from Docker Hub to production in a safe, quick and sustainable way.
Continuous delivery is a software development practice where code changes are automatically prepared for a release to production. A pillar of modern application development, continuous delivery expands upon continuous integration by deploying all code changes to a testing environment and/or a production environment after the build stage [1].
As a result, developers will always have the next release available. One that went through a code review and that has passed through a standardized testing process.
Adding CD to our current implementation would look something like this:
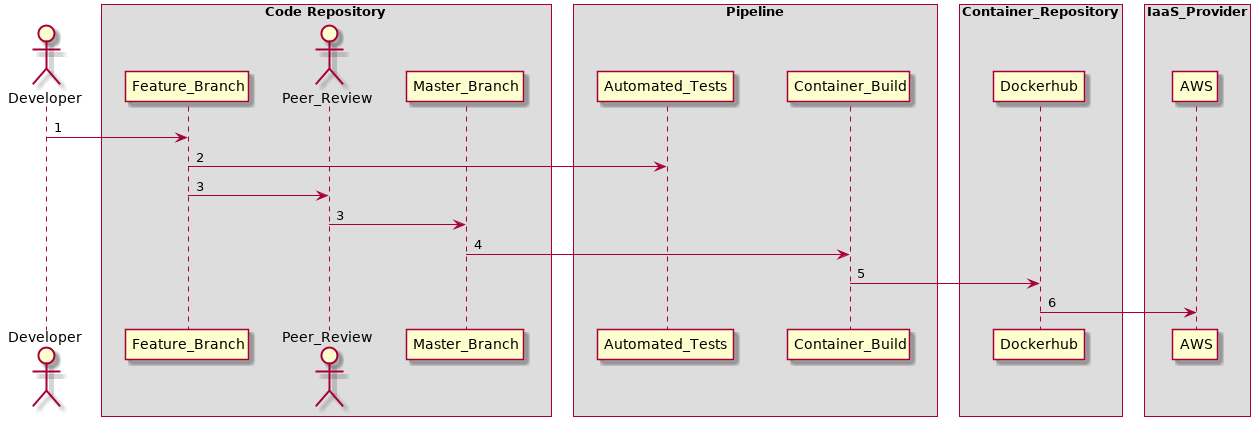
Continuous Integration + Continuous Delivery (After)
Gameplan
To do this, we are going to use Amazon Web Services (AWS) as our cloud provider, so make sure you have an AWS account. We are also going to use Elastic Beanstalk (EB). The latter is a Platform-As-A-Service that allows developers to easily leverage on AWS for application deployment and management.
Architecture
Since trendlit has a very simple architecture, using an EC2 instance and Application Load Balancer should be more than enough.
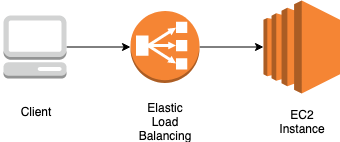
2-Tier Architecture
EC2
Amazon Elastic Compute Cloud (Amazon EC2) is a web service that provides resizable compute capacity in the cloud. It is designed to make web-scale cloud computing easier for developers [2].
Application Load Balancer
Application Load Balancer is best suited for load balancing of HTTP and HTTPS traffic and provides advanced request routing targeted at the delivery of modern application architectures, including microservices and containers [3].
Configure access to AWS
We are going to setup an application and environment using EB. This will be done by using the AWS command line tool. If you are a macOS user install it using homebrew, otherwise you can also use pip:
sudo pip install U awscli
Setting up AWS in our host machine
Credentials
We need to make sure that we have the credentials file in the following path: $HOME/.aws/credentials
[default]
aws_access_key_id = SECRET
aws_secret_access_key = SECRET
If you don’t know how to get your keys you can click here.
Region
We need to make sure that we have the config file in the following path: $HOME/.aws/config
[default]
region=us-west-2
If you want to make sure to use the closest AWS region to you, go to https://www.cloudping.info/. Otherwise you can always use the default one which is us-west-2.
Create an EB Application
An EB application is like a project folder that will allow us to organize our components. So if we have a project named trendlit, we will name our EB application as trendlit.
aws elasticbeanstalk create-application --application-name trendlit --description "trendlit application"
Retrieve the name of the latest Docker EB stack available
Since we are going to run a docker container in our EC2 instance, we can take advantage of the stack that it is offered straight out by the box by AWS. We can get the name by running:
aws elasticbeanstalk list-available-solution-stacks | grep Docker | head -1 | sed ‘s/,//g’ | sed ‘s/ //g’
Sample output
“64bitAmazonLinux2018.03v2.12.11runningDocker18.06.1-ce”
Since we are working with JSON data, what about introducing jq here?
jq is like sed for JSON data — you can use it to slice and filter and map and transform structured data with the same ease that sed, awk, grep and friends let you play with text.
If you are a macOS user install it using homebrew, otherwise you can see how to install jq here.
After, we can run the following command to get something cleaner:
aws elasticbeanstalk list-available-solution-stacks | grep Docker | head -1 | sed ‘s/\,//g’ | sed ‘s/ //g’
Sample output
# Keep the result in your notepad, because we will use it later.
64bit Amazon Linux 2018.03 v2.12.11 running Docker 18.06.1-ce
Create an EB environment
An application can have several environments such as development, staging, and production. For this example we will create only one environment inside the application we just created. Doing this, will allow us to run the application container that is waiting for us in Docker Hub.
aws elasticbeanstalk create-environment --application-name trendlit --environment-name trendlit-production --description "trendlit's production environment" --solution-stack-name "64bit Amazon Linux 2018.03 v2.12.11 running Docker 18.06.1-ce" --tier "Name=WebServer,Type=Standard,Version=''"
By running the previous command, we create an environment inside trendlit application called trendlit-production. Here, we also specify to use the AWS Docker stack that we just got in the last step.
Retrieving the public endpoint
After creating the environment, we can retrieve the public hostname of the EB load balancer. In order to do it we can use the following command:
aws elasticbeanstalk describe-environments --environment-name trendlit-production | jq -r '.Environments[0]'.CNAME
Sample Output
If you get null, just wait a minute or so and you should be able to eventually get the public endpoint:
trendlit-production.txegsnm9ba.us-west-2.elasticbeanstalk.com
This means that we should be able to curl it:
curl -I trendlit-production.txegsnm9ba.us-west-2.elasticbeanstalk.com
If everything went well, you can go to your AWS online console and go to the respective EB section. After making sure that you are in the region, you specified earlier, you should see something like this:
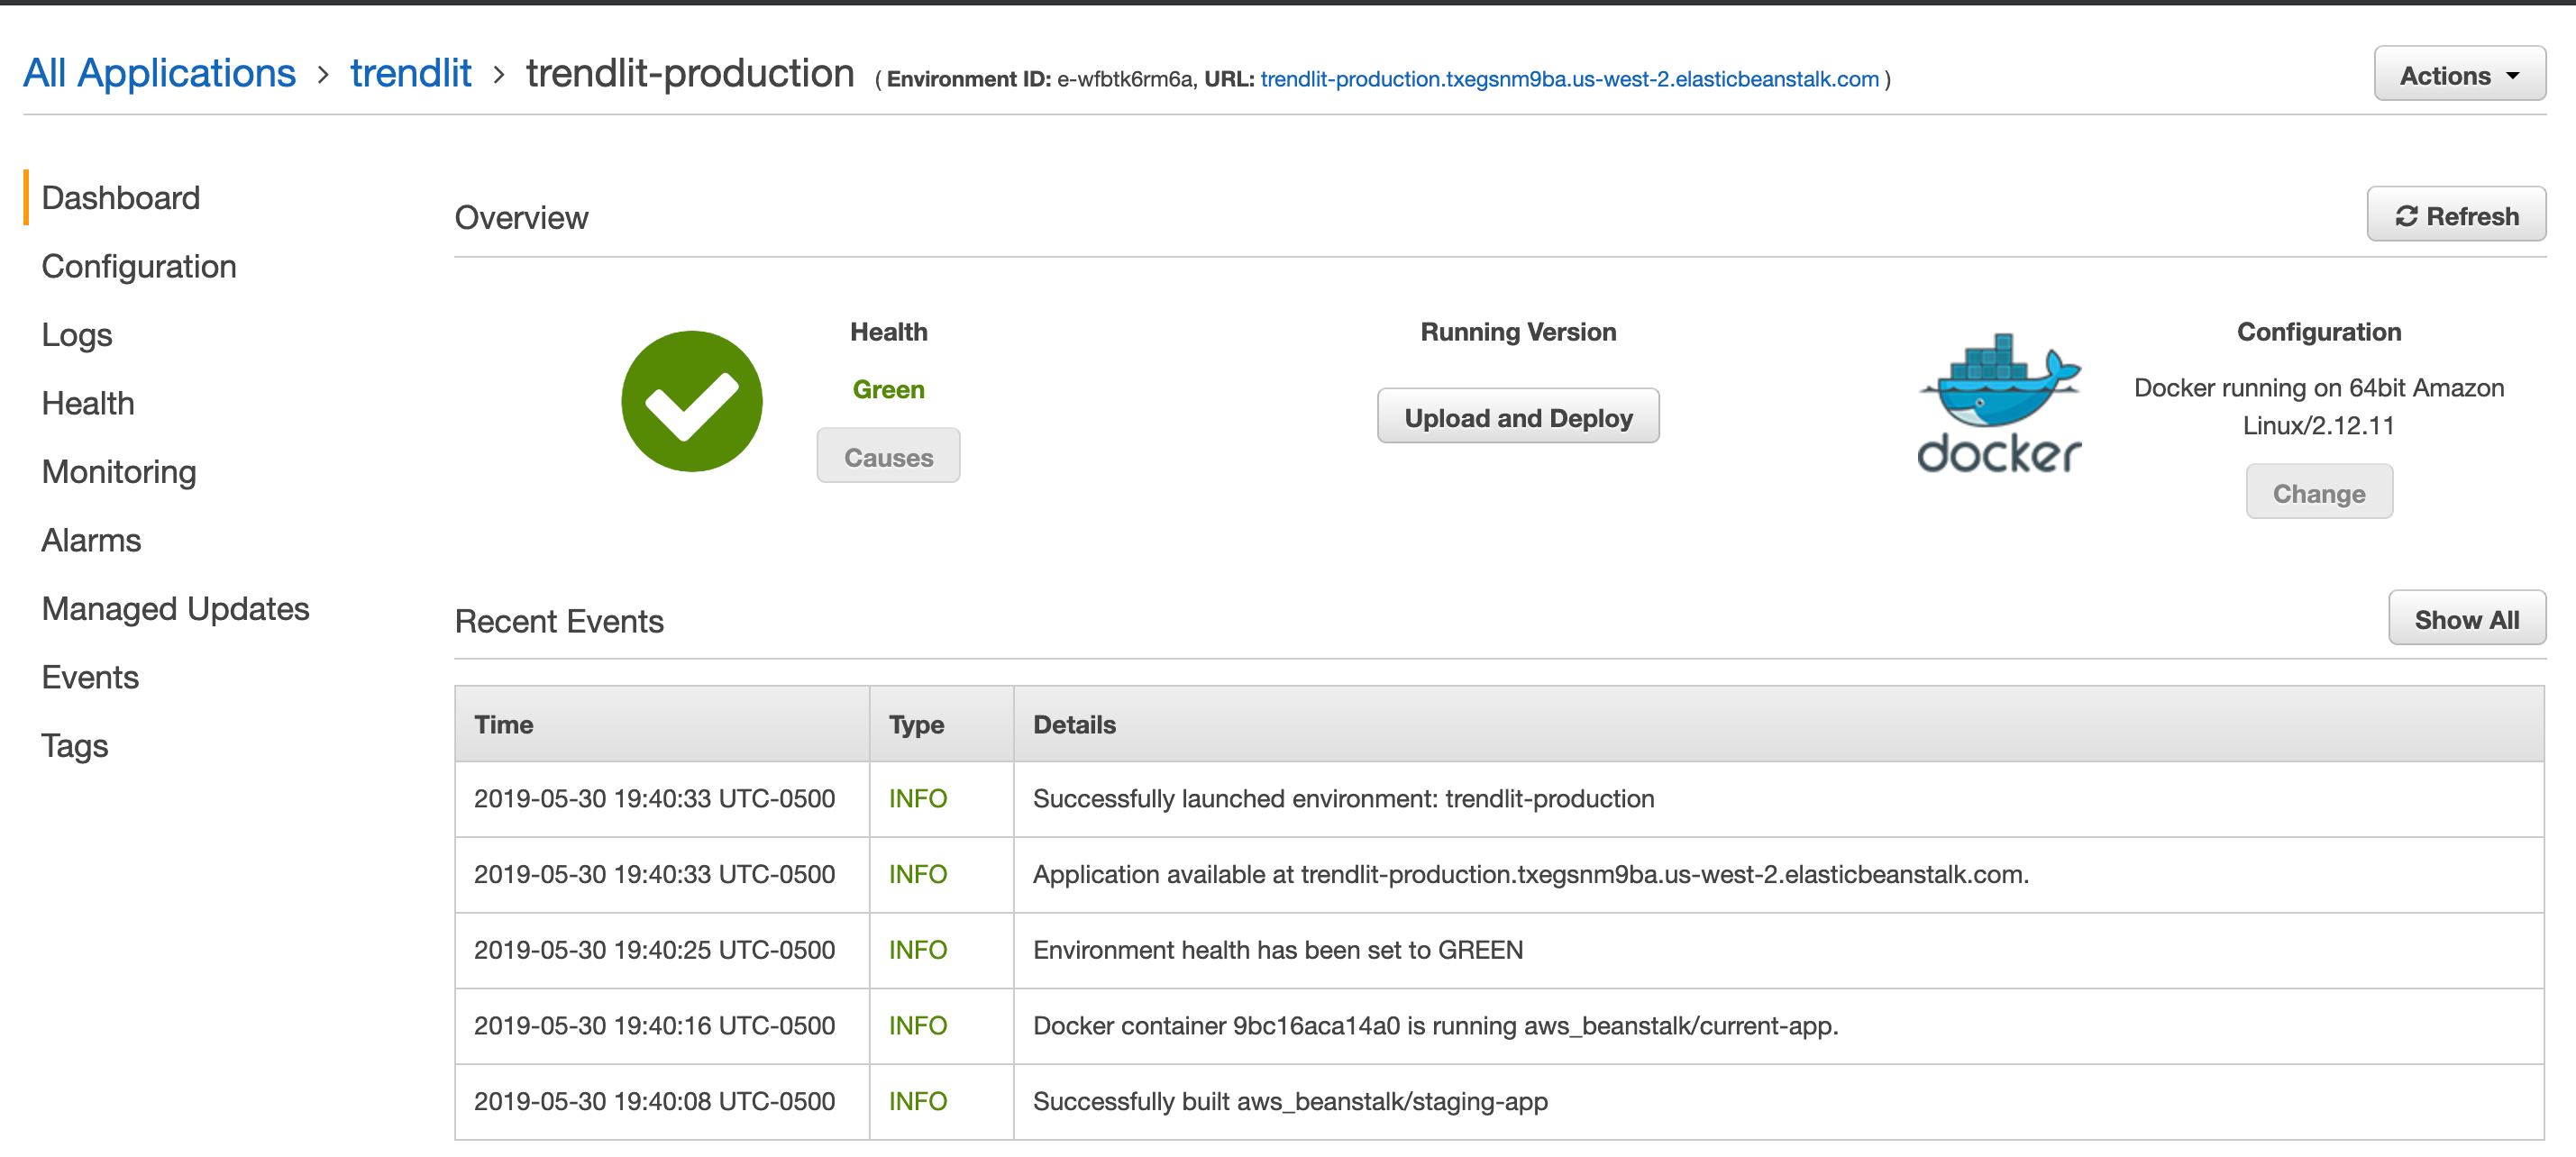
And if you go to the respective application URL and you can see “Congratulations” we are golden.
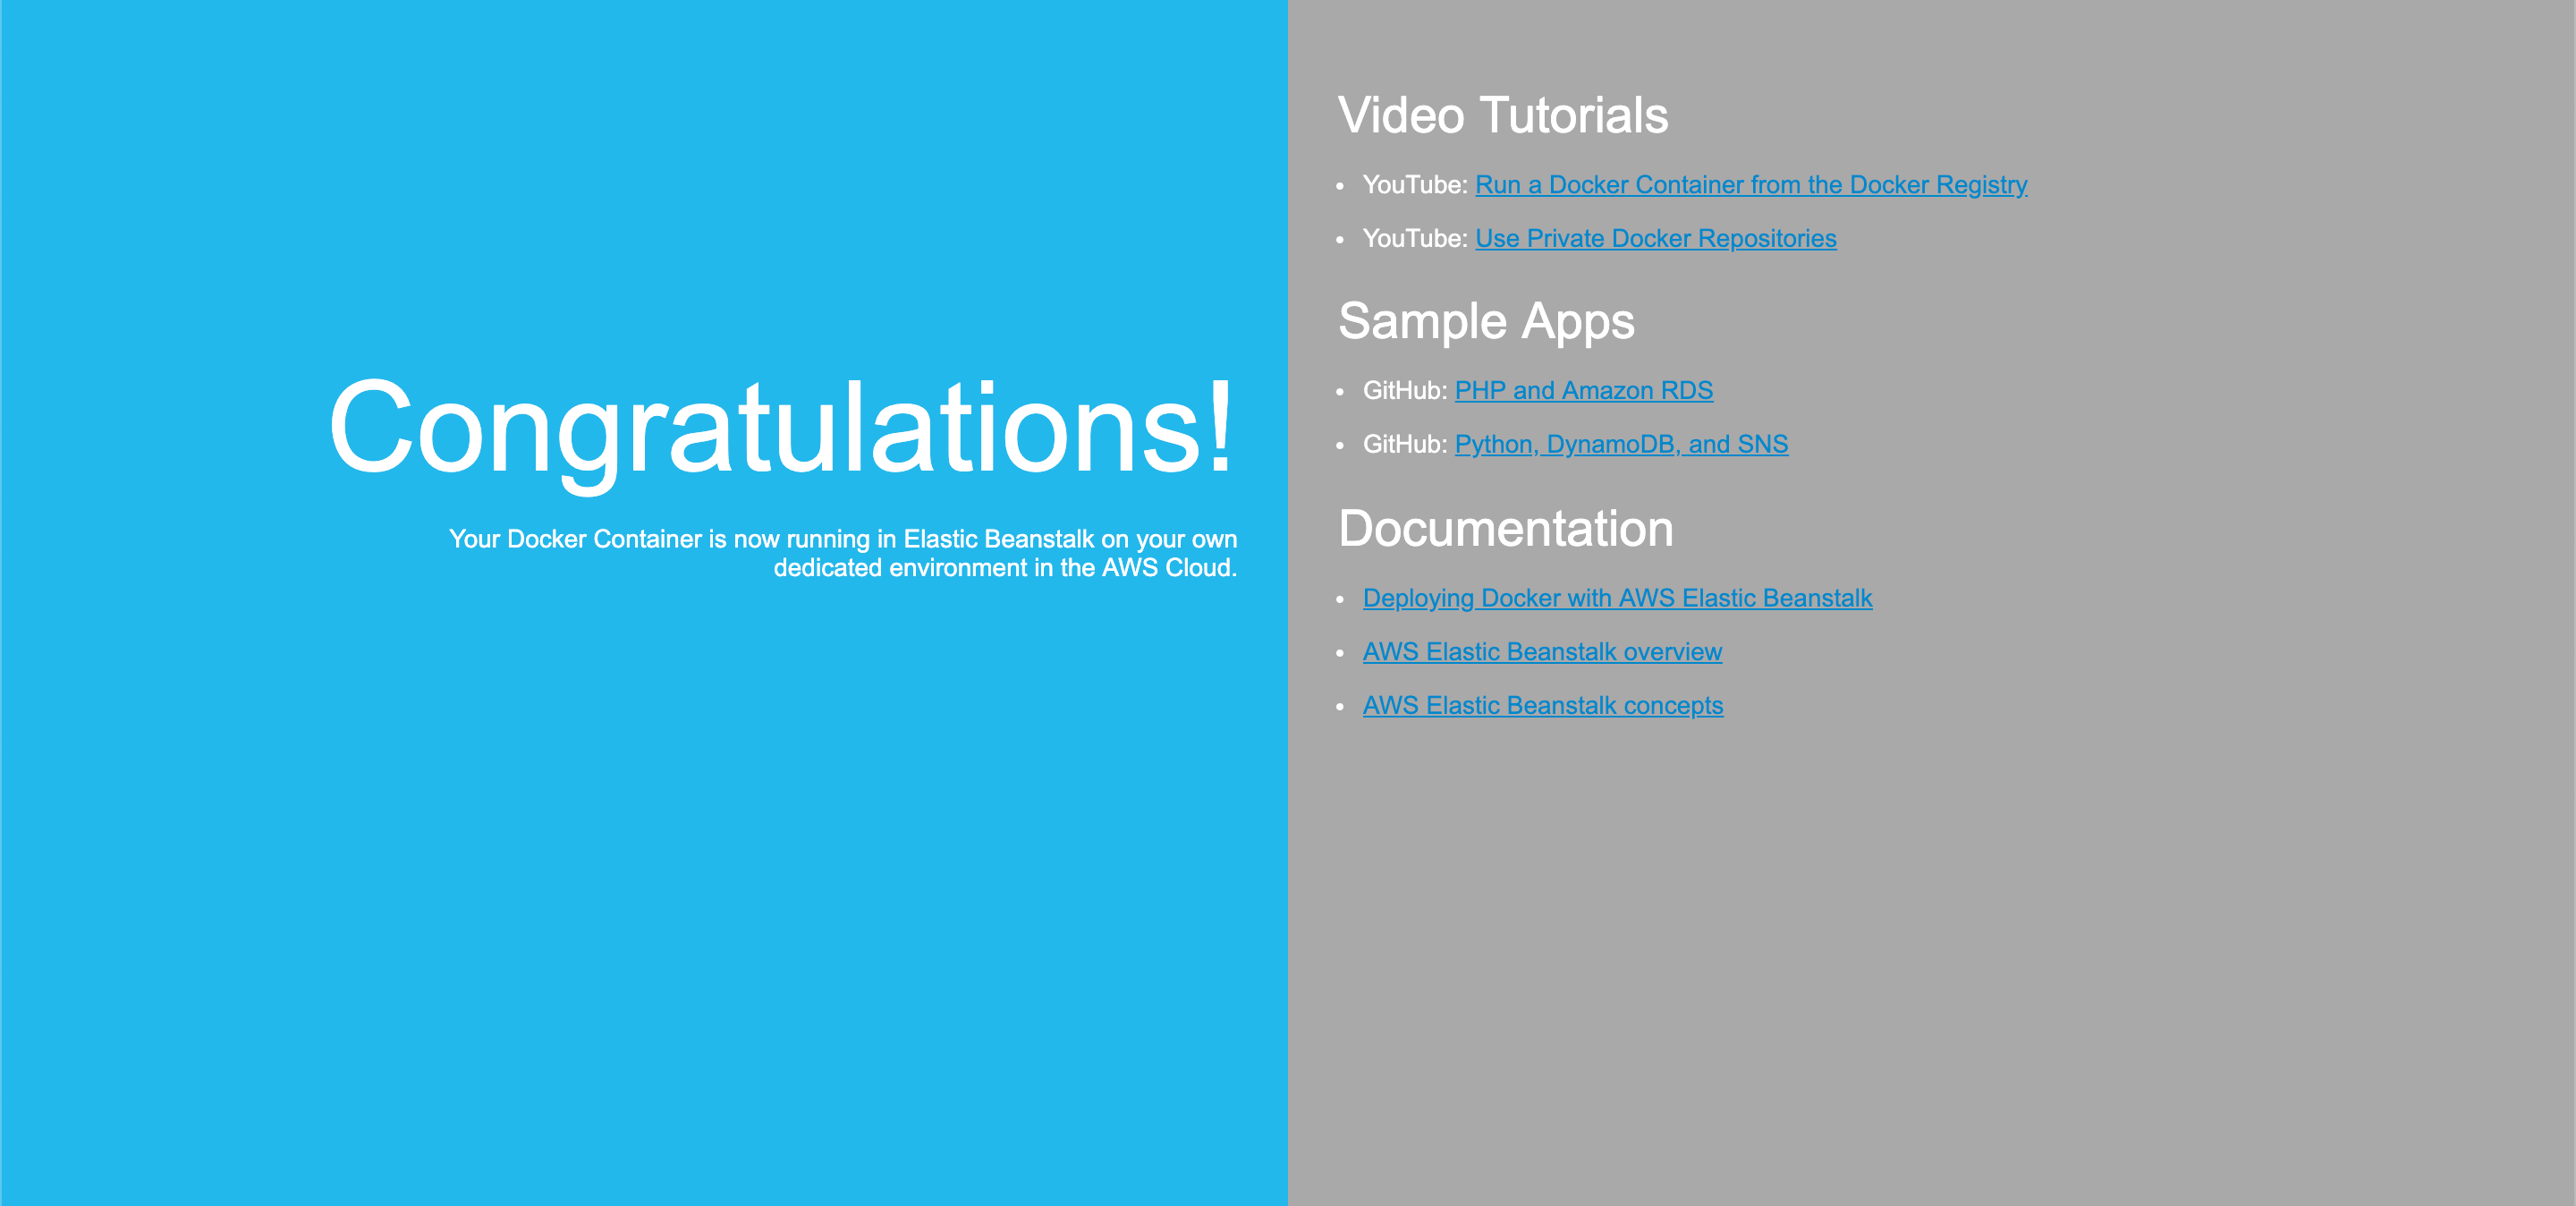
http://trendlit-production.SOME_NUMBER.SOME_REGION.elasticbeanstalk.com/
Deploying The Container In Our Environment
Our infrastructure is now set, but we still need run our Docker container in it. So we are going to use this config file in order to configure our running server.
https://gist.github.com/shekodn/eff5622ed83e7ec6d8407f97fb655364 </small class=”img-caption”>
Uploading the Application Configuration to S3
We need to save the application configuration in our infrastructure so EB can easily retrieve it. So what about using an AWS S3 Bucket?
An Amazon S3 bucket is a public cloud storage resource available in Amazon Web Services’ (AWS) Simple Storage Service (S3), an object storage offering [4].
First, we need to create an S3 with a unique identifier
# This is a suggested name, but feel free to use whatever you want.
aws s3 mb s3://trendlit-YOURNAME
Now that we have our S3 Bucket, we can copy the trendlit-latest.json file into it.
aws s3 cp trendlit-latest.json s3://trendlit-YOURNAME/
Assigning the application configuration to the EB environment
Now that our configuration lives inside our infrastructure we can tell EB to deploy a specific version.
aws elasticbeanstalk create-application-version --application-name "trendlit" --version-label trendlit-latest --description "This config will always pull the latest tag from Docker Hub" --source-bundle "S3Bucket=trendlit, S3Key=trendlit-latest.json"
Deploy the application configuration to the respective EB environment
In order to tell AWS to update the EC2 instance where our application is running, we need to do the following:
First, we need to get EnvironmentId so we can update that specific environment.
aws elasticbeanstalk describe-environments --environment-names trendlit-production | jq -r '.Environments[0].EnvironmentId'
Sample Output
# Keep the result in your notepad, we will use it later.
e-12345678
Then we can proceed to update the desired environment by running:
aws elasticbeanstalk update-environment --application-name trendlit --environment-id e-12345678 --version-label trendlit-latest
After the update completes successfully, we should be able to see your application up and running.
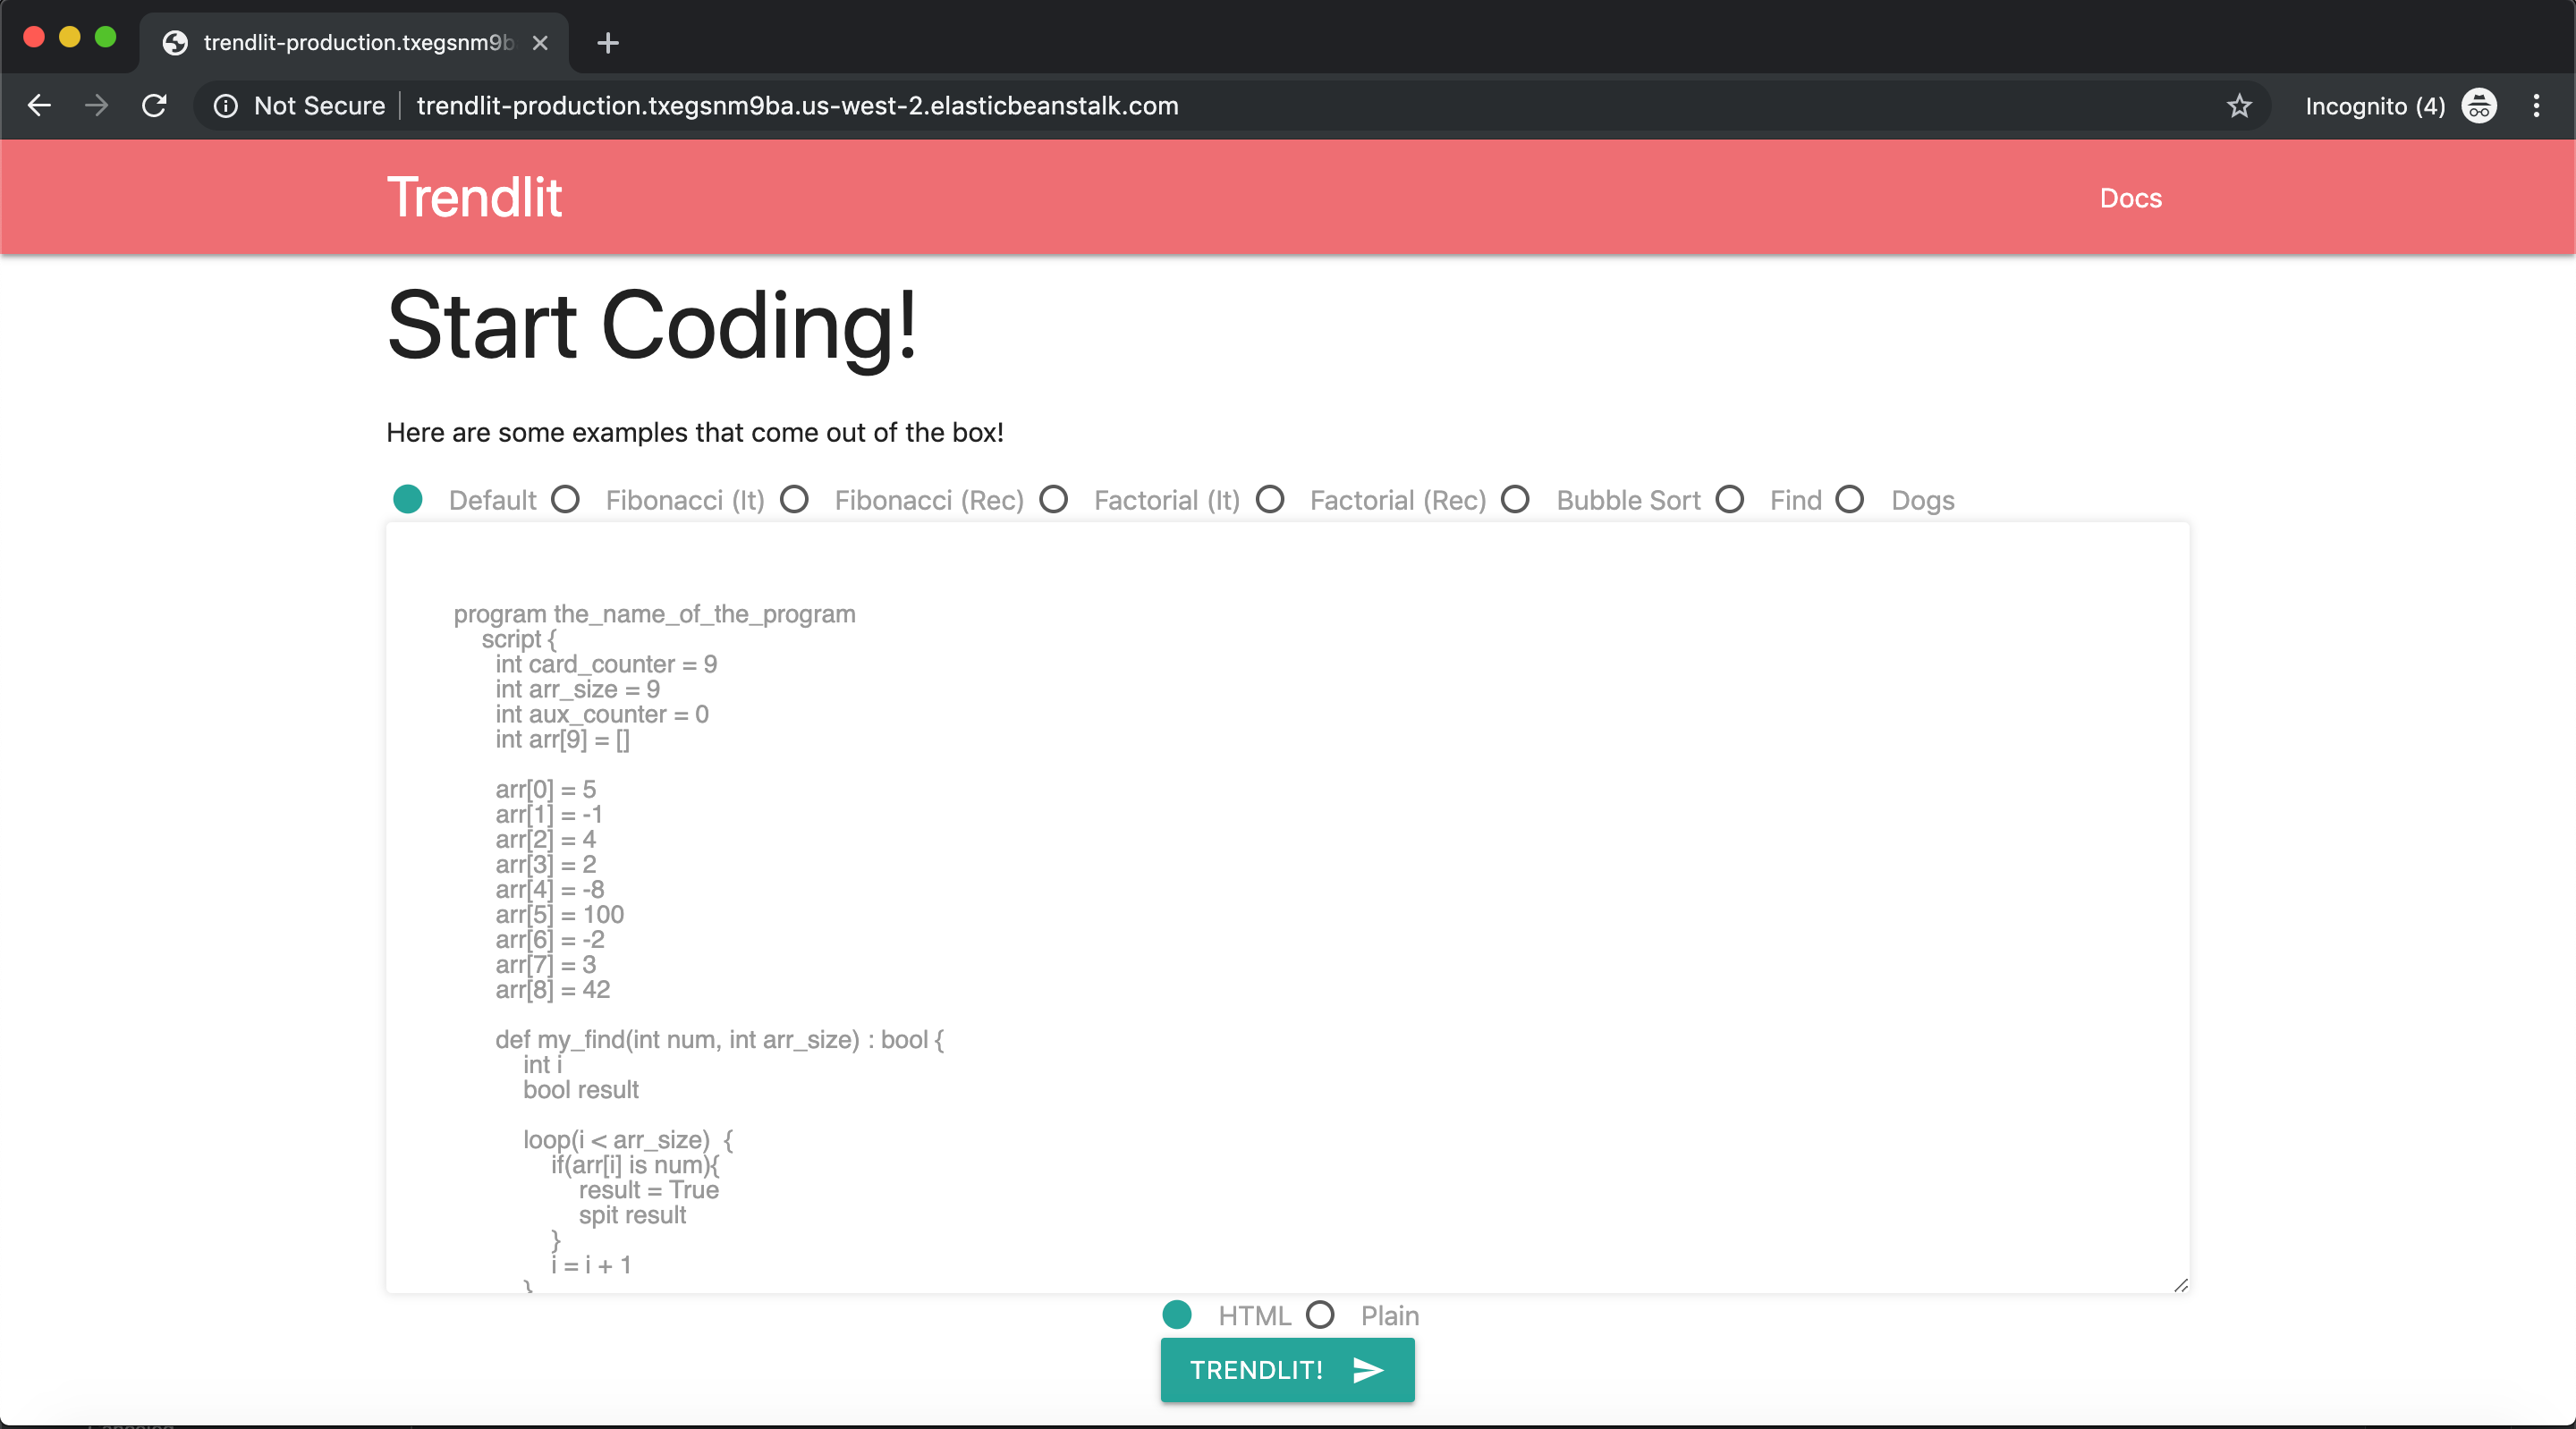
trendlit is now available to the whole internet
Wrapping it up
For now, we have an automated process that tests our application, pushes it to a container repository, and updates the latest version of the application with single command. Although it might seem we finished the proposed implementation, there is still a lot of work that can be done. We must be aware that we neglected a lot of important aspects such as the least privilege principle in order to go from Localhost to Production. The next version should be focused on balancing the security risks while keeping up the implementation advancement.
Some things that we could also address in the next release are things like having a rollback strategy. In other words, we could add a step to the pipeline’s workflow for uploading the configuration file with the respective release version. So if there is a problem with a release, we can always select the previous version and roll it back with a single command:
aws elasticbeanstalk update-environment --application-name trendlit --environment-id e-12345678 --version-label trendlit-X.X.X
If you have any suggestions, I would love to hear them. I’m pretty sure we can include them in future roadmaps. BTW, Pull Requests are open ;) so I would like to collaborate with you if you think we can improve the process. In the meantime, I will be working on part 3.
References:
[0] https://colintoh.com/blog/aws-elastic-beanstalk-survival-guide-introduction
[1] https://aws.amazon.com/devops/continuous-delivery/
[2] https://www.quora.com/What-is-EC2
[3] https://aws.amazon.com/elasticloadbalancing/
[4] https://searchaws.techtarget.com/definition/AWS-bucket
Also published on Medium.
Written on June 3rd , 2019 by Sergio Diaz