Sergio Diaz enthusiastic security engineer
The OAuth 2.0 Waltz
Photo by Thomas AE on Unsplash
This post covers an overview on how the OAuth 2.0 protocol works and a practical example in golang in order to apply and better understand it’s flow.
Why OAuth?
Imagine that Alice just got the car of her dreams. To celebrate, she decides to go out to eat in a fancy restaurant and there is a valet parking service. When she gives her keys to the valet, she is giving that person access to practically everything: Trunk, dashboard, and being able to go anywhere at full speed. Wouldn’t it be nice for Alice to have a valet key?
- One that tells the car that the maximum speed is 30 km/h
- One that sends Alice an alert if the car goes too far away from her
- One that doesn’t allow the trunk to be open
After all, the valet is supposed to go and park the car. So why would she need full access when she can exactly have the permissions she need in order to do the job?
Well, that’s exactly the problem that OAuth 2.0 (OAuth) solves. This protocol is used to exchange valet keys or permissions across the internet. For example, let’s say that Alice just signed up into a popular contact application. Then the app asks her if she wants to import her contacts from her Google account. Instead of Alice giving the app her google username and password, the contact application get Alice’s contacts using a magic number that was obtained by using the OAuth protocol.
The OAuth Jargon
After having an overview of why the OAuth protocol is used, is time to get more technical and get to know some of the OAuth terminology.
Resource owner
The data owner, in this case Alice.
Client
The entity that asks the resource owner permission to get the respective resources, in this case the popular contact application.
Authorization Server
The system that the resource owner (Alice) uses to accept and give permission to the client (Contacts app) to use the respective resources (Alice’s contacts), in this case Google.
Resource Server
The system or API that holds the data that the client wants to get to, in this case Google’s People API.
Authorization Grant
The code that proves that the resource owner has accepted to share the respective resources.
Scope
Defines how much authorization will the Access Token have. For example, The Resource Owner might agree to share only her name or the whole access to her Gmail account.
Redirect URI
The redirect or callback URI indicates where the Authorization Server should go once the Authorization has been granted.
Access token
The Access Token is the magic number (cryptographically generated) that the client needs in order to ask for the resources to the Resource Server. In this case, the resource server will get the token and verify whether it is valid or not. If it’s a legit one, the Resource Server will give back the respective resources (the ones agreed by the scope) to the client.
From Theory To Practice
Now that we know the OAuth’s jargon we can now proceed to make a tangible use of it.
Quickstart
- Create the authorization server here.
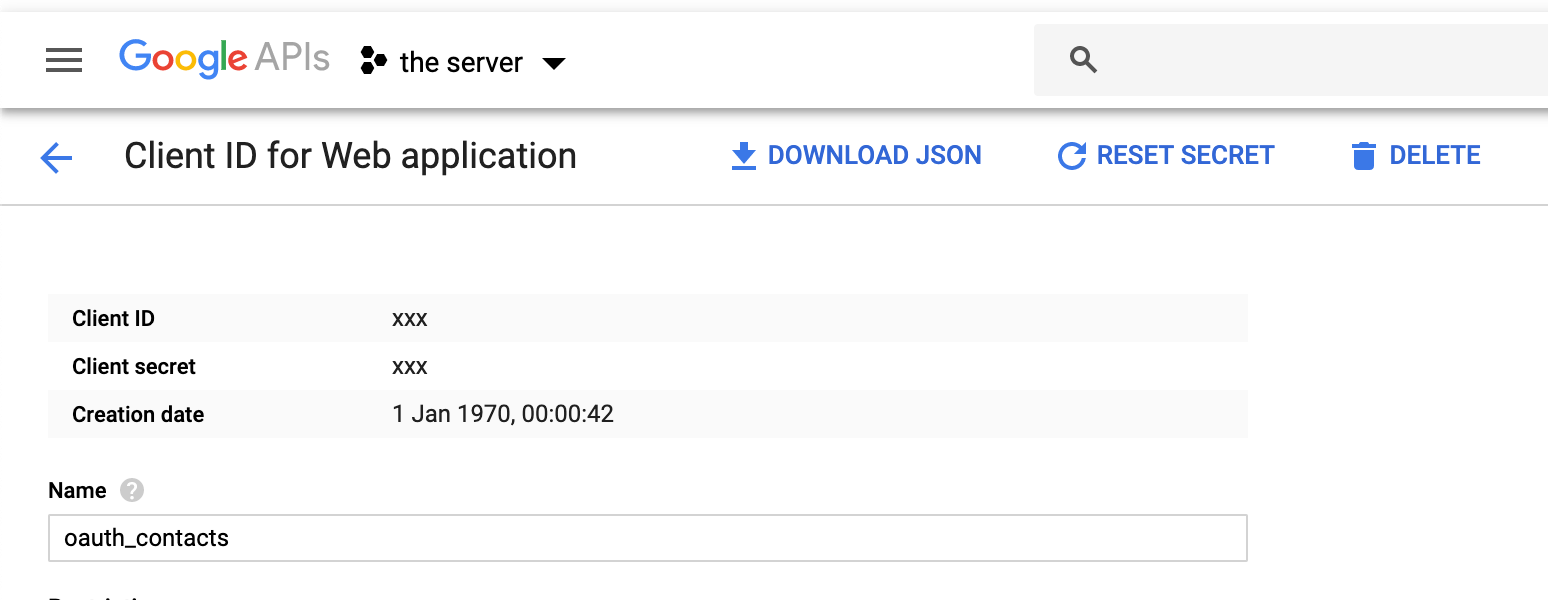
- In the Authorized redirect URIs don’t forget to include the application’s callback URI: http://localhost:8000/callback
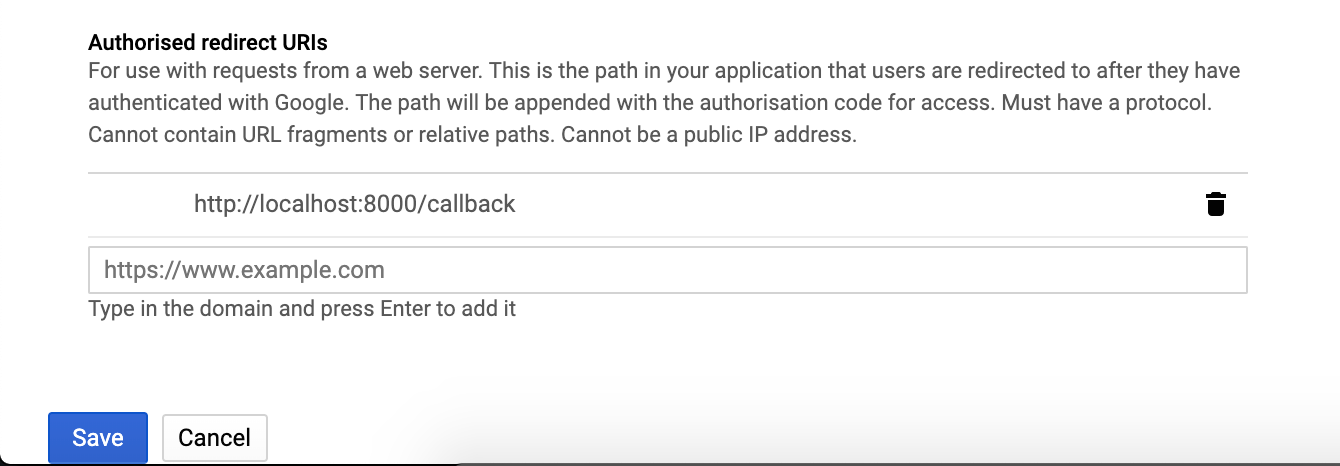
https://console.developers.google.com/apis/credentials/…
- Clone the git repository in the respective $GOPATH ($GOPATH/src/github.com/shekodn/)
- Create an .env file with the respective Client ID and Client Secret
GOOGLE_CLIENT_ID=xxx
GOOGLE_CLIENT_SECRET=xxx
PORT=8000
- In your terminal just do make run
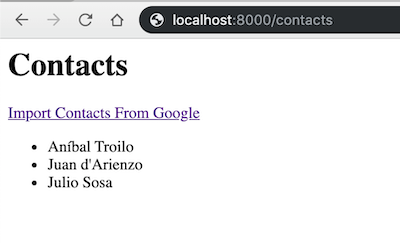
- Go to the client that should be running in http://localhost:8000/contacts
- Click on Import Contacts From Google
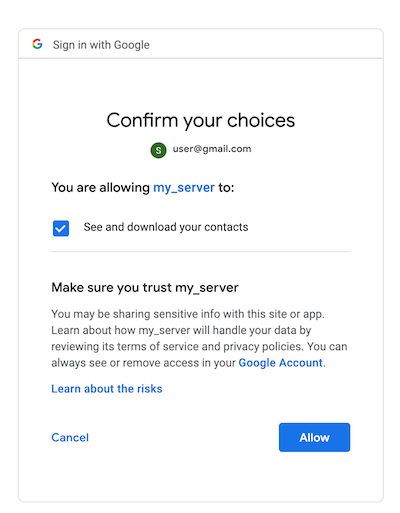
- Select your Google account and give permission to the client to get the respective resources
- Sit back and wait for the client to retrieve the resource owner’s contacts
What happened?
Photo by Julius Drost on Unsplash
If we go to our terminal, we can find the logs and see the OAuth Waltz in action:
https://gist.github.com/shekodn/cea1d36addba1a6f3ad8b850c1c06869.js
- The resource owner selected Import Contacts From Google (line 4)
- The client redirected the resource owner to the authorization server (line 5)
- The resource owner gave a specific permission or a scope to the client by selecting allow
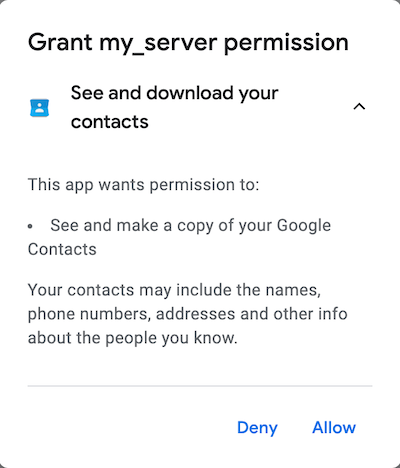
- Since the resource owner allowed the client to use the respective resource, the redirect URI was processed (line 7)
- Under the hood, the client is using the authorization grant that was sent from the authorization server to retrieve a valid access token (line 10)
- The access token was granted to the client and now the client is using it to retrieve the contacts from the resource server (line 11)
- Finally, the client received the resource owner’s contacts and the displays them in the application
OAuth Flows
Photo by Akhil Chandran on Unsplash
OAuth 2.0 has four different flows:
- Authorization Code
- Implicit
- Resource Owner
- Client Credentials
In this case we used the authorization code flow, because we had a front and a back channel. In other words, we had a front-end and a back-end.
Back-channel
When communication is done from server to server (e.g. back-end to back-end), it is more secure since it is done by using end-to-end encryption.
Front-channel
The front channel in this case is the browser. Browsers are becoming more and more secure, but compared to communication from server to server, it is not as secure. An attacker might be able to obtain access to the application tokens (e.g. using XSS) or if she has access to your computer, the cookies and tokens are stored in the browser’s storage for anyone to see.
Now that we know what a front and back channel is, we can justify why we used the Authorization Code flow. First, we used the front-channel (less secure channel) to retrieve an authorization grant, which is useless by itself, because in order to exchange that grant for an authorization token we need the authorization grant plus the client secret which is only known by the server (back-channel), not the browser (front-channel). So we obtain the token in a more secure way by relying on the back-channel.
Using another flow
There are cases in which an application might lack a back-end (Single Page Application) or when the authorization might be from back-end to back-end. So, before implementing OAuth for an application, we need to know which is the most convenient flow according to the project’s needs.
Wrapping It Up
After going through this post, now we have a general overview of how OAuth 2.0 works, it’s flow, and how we can use it in order to ask for specific resources. Last but not least, let’s not forget the OAuth was made for authorization and not for authentication. If we want to use this protocol for the latter, we should include something like OpenID since it will allow to have a better session management, but that’s a topic for another post. Thanks for reading and if you have any question or suggestions, feel free to leave a comment.
Resources
https://developers.google.com/identity/protocols/googlescopes
https://www.youtube.com/watch?v=996OiexHze0
https://livebook.manning.com/book/understanding-api-security/chapter-1
Write a Kubernetes-ready service from zero step-by-step
Also published on Medium.
Written on September 23rd , 2019 by Sergio Diaz